Lemon-Raspberry Chia Hand Pies + Pie Crust Cutout Tutorials
After having so many of you guys request the recipe and instructions for how I made my handpies I posted on my Instagram awhile back, and also the pie I made for my family's Thanksgiving- I am finally sharing it with you guys!
This post will cover my Raspberry-Lemon Chia Hand Pies, as well as how to make the fun crust I did for my Apple Cider Caramel Pie from Food52 that I made for Thanksgiving.
And, no. None of these are remotely gluten-free or vegan- sorry guys! Very traditional all-butter crusts and regular flour here.
What's another nice thing about these hand pies in particular is that if you have the chia jam made already in the fridge, and pie dough just sitting in the freezer, you can whip these up so fast. If you did the process all at once, it is time-consuming for sure. I recommend doing these steps over a few days to break it up!

Raspberry-Lemon Chia Hand Pies
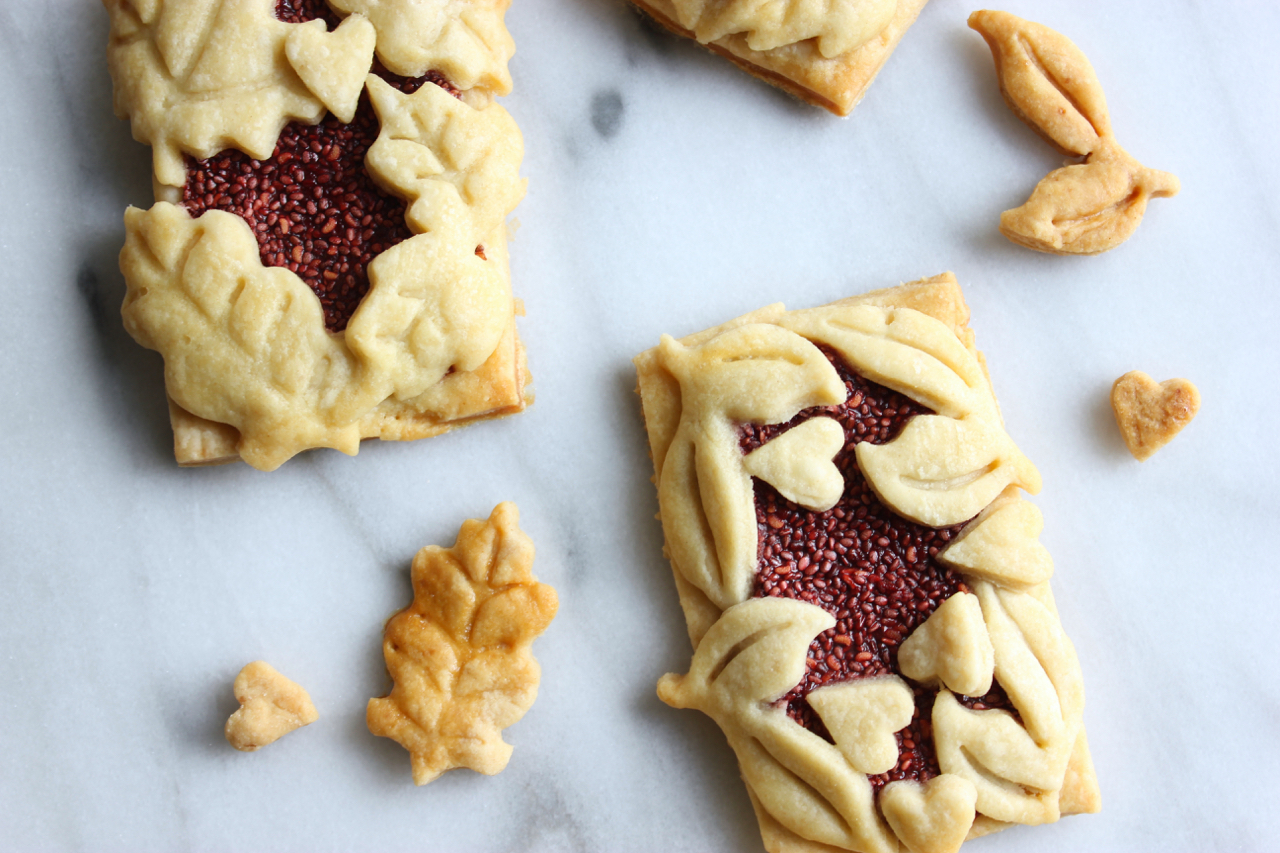
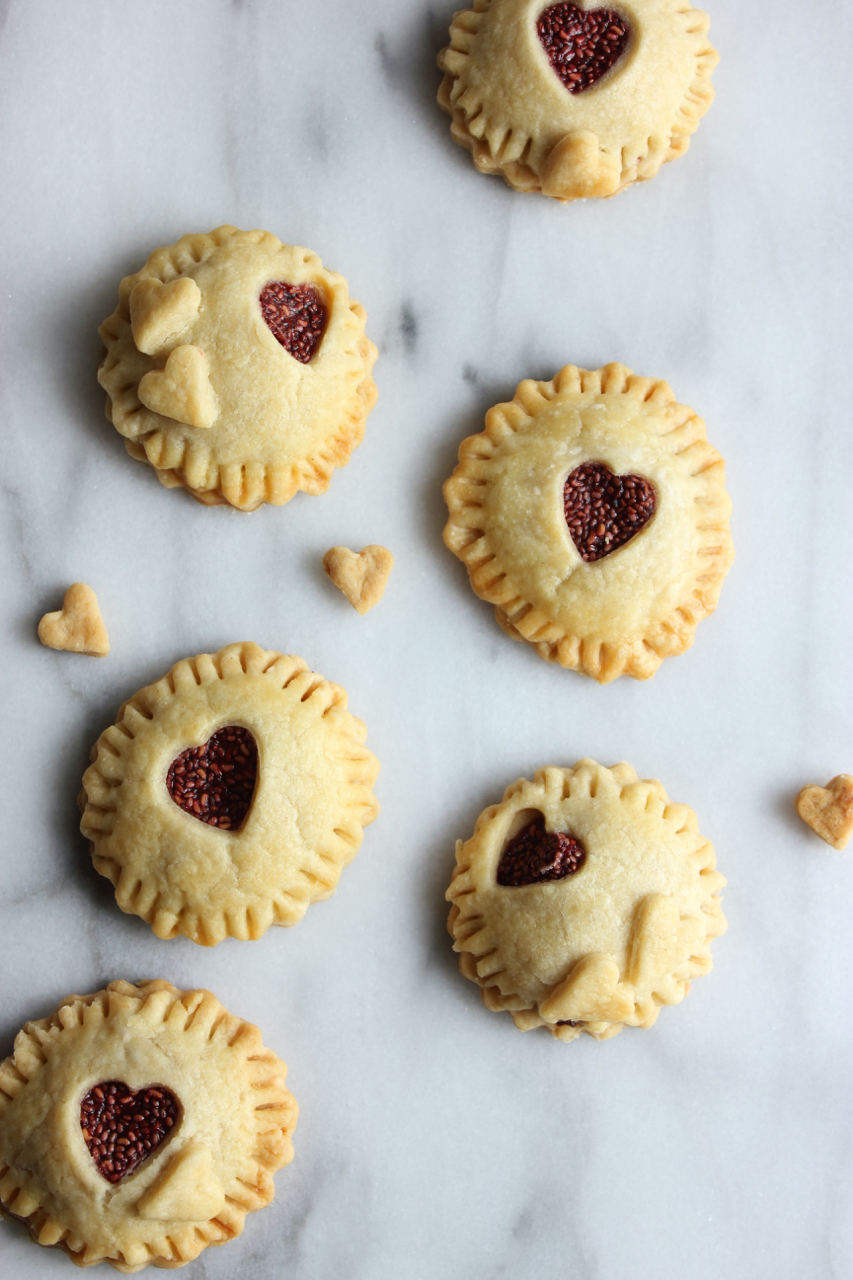
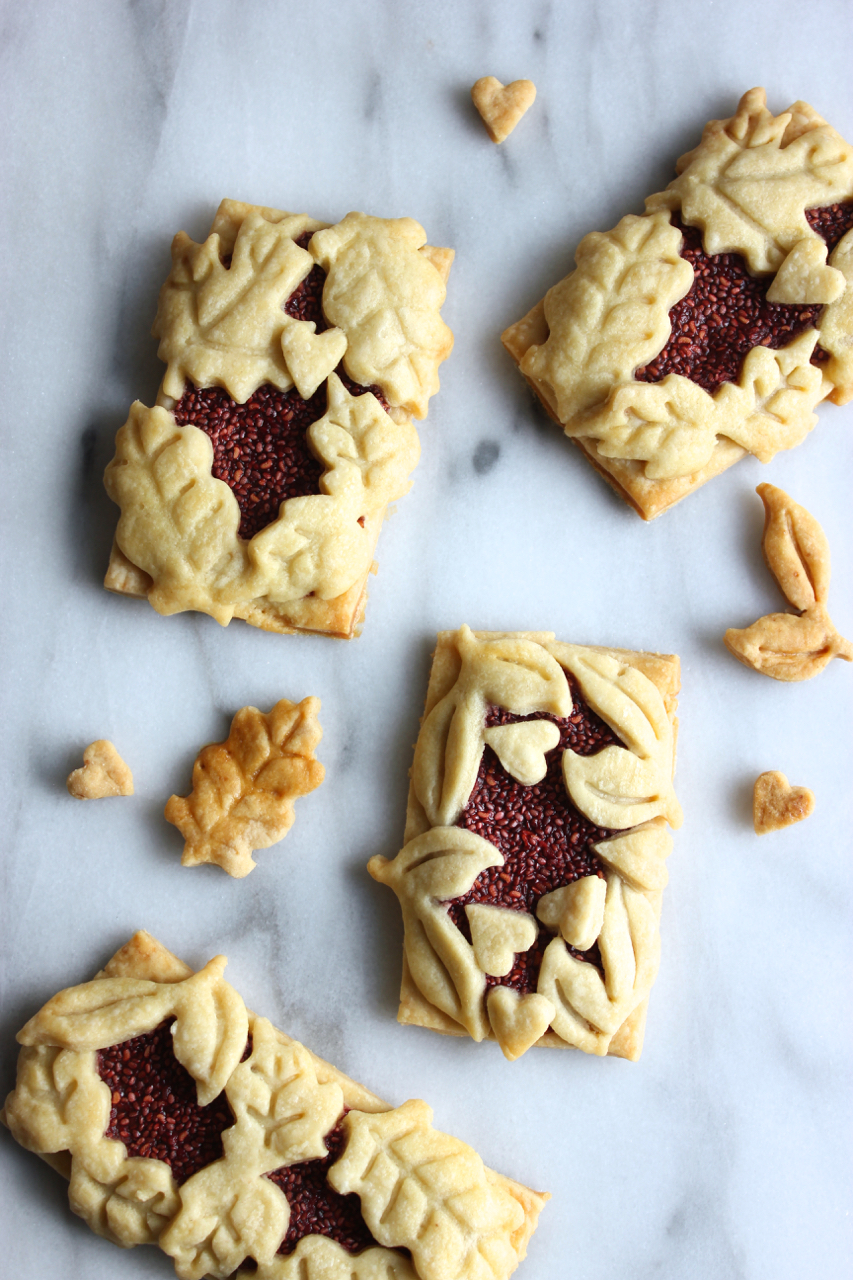
*how many hand pies this recipe churns out completely depends on the shapes and sizes of cutouts you choose. One classic double crust pie dough recipe gave me about 5 of those leafy rectangles, and 6 of the circular mini hand pies.
Ingredients
For Pie Dough:
2.5 cups All-Purpose Flour
2 sticks (1 cup) unsalted butter, cut into small pieces & chilled
1 tsp Salt
1 tsp Sugar
1/4 cup + 2 tbsp Ice Water
For Raspberry Lemon Chia Filling (makes about 1.5 cups- you will have leftovers if only using for pies)
1 pint (2 cups) Raspberries (frozen or fresh)
Juice from 1/2 lemon
2 tbsp + 1 tsp Chia Seeds
1 tbsp Coconut Sugar
1/3 cup Water
Optional Egg Wash for crust
1 egg
2 tbsp of water
Recipe
For Raspberry Lemon Chia Filling:
1. In a small pot, combine raspberries, coconut sugar, and water. Bring to a boil, then reduce to a simmer. Cook for 5-10 minutes until berries are mushy and begin to disintegrate.
2. Remove pot from heat. Add chia seeds and lemon juice, and stir until thoroughly combined. Pour into a heatproof container and let cool completely. Use right away or keep in an airtight container in the refrigerator for up to a week.
For Pie Dough (can be made well in advance and kept in the freezer):
1. Combine flour, salt, and sugar in a food processor. Add chunks of butter, and pulse until you reach a coarse mixture (about 10-14 seconds total).
2. Begin to continually run machine, steadily adding ice water SLOWLY through the feeding tube. Pulse until dough starts to hold together (should not take more than 30 seconds). The dough should hold together just right when you pinch it- if it's too crumbly, add more water. Don't over pulse or you will get sticky, tough dough.
3. Split dough into two equal balls and flatten into disks about 1/2" thick. Wrap each in plastic wrap. If planning to use the dough right away, chill in the refrigerator for minimum of 1 hour. If planning to use later, freeze in an airtight container or ziploc.
To make the hand pies
1. Preheat your oven to 370ºF and line a baking sheet with parchment paper.
2. On a gently floured surface, roll out your pie dough until about 1/4" thick. Begin to cut desired shapes for hand pies:
For Circular Mini Hand Pies: I used a biscuit cutter to cut 2 circles out per pie, then a smaller shape cutter to cut out hearts in the center. You can use whatever cutters you desire. Spoon a small spoonful of chia jam onto the plain circle, then layer the cutout circle on top. Use a fork to gently push down to crimp around the edges
For Leafy Rectangular Hand Pies: I used a sharp chef's knife to cut rectangles (about 2"x4") for the bottom supporting layer. Then, I used leaf-shaped pie cutters to make pretty cutouts. Spoon a bit of chia jam onto the supporting layer, then carefully line the perimeter with your cutouts, gently pressing down around the outside perimeter of leaves to ensure the jam doesn't spill out too much.
3. After hand pies are made, create the egg wash by simply beating the egg and water together. Use a pastry brush to spread a light layer of egg wash over all hand pies.
4. Place hand pies in oven and bake for about 20-30 minutes (totally depends on your oven!), rotating baking sheet about halfway through. Pastry should be a light golden-brown shade when finished. Let cool on baking sheet for 5 minutes. Transfer hand pies to a cooling rack until desired temperature to serve!
Now onto the Cider Caramel Apple Pie!
Cider Caramel Apple Pie from Food52
You can find the recipe HERE on Food 52's website. I used the exact same Pie Dough recipe as listed in the recipe above for the hand pies, as it is my go-to classic. Here are my tips below on how I made my special cut-out crust and tweaks I'd make on the Food 52 recipe:
For Crust
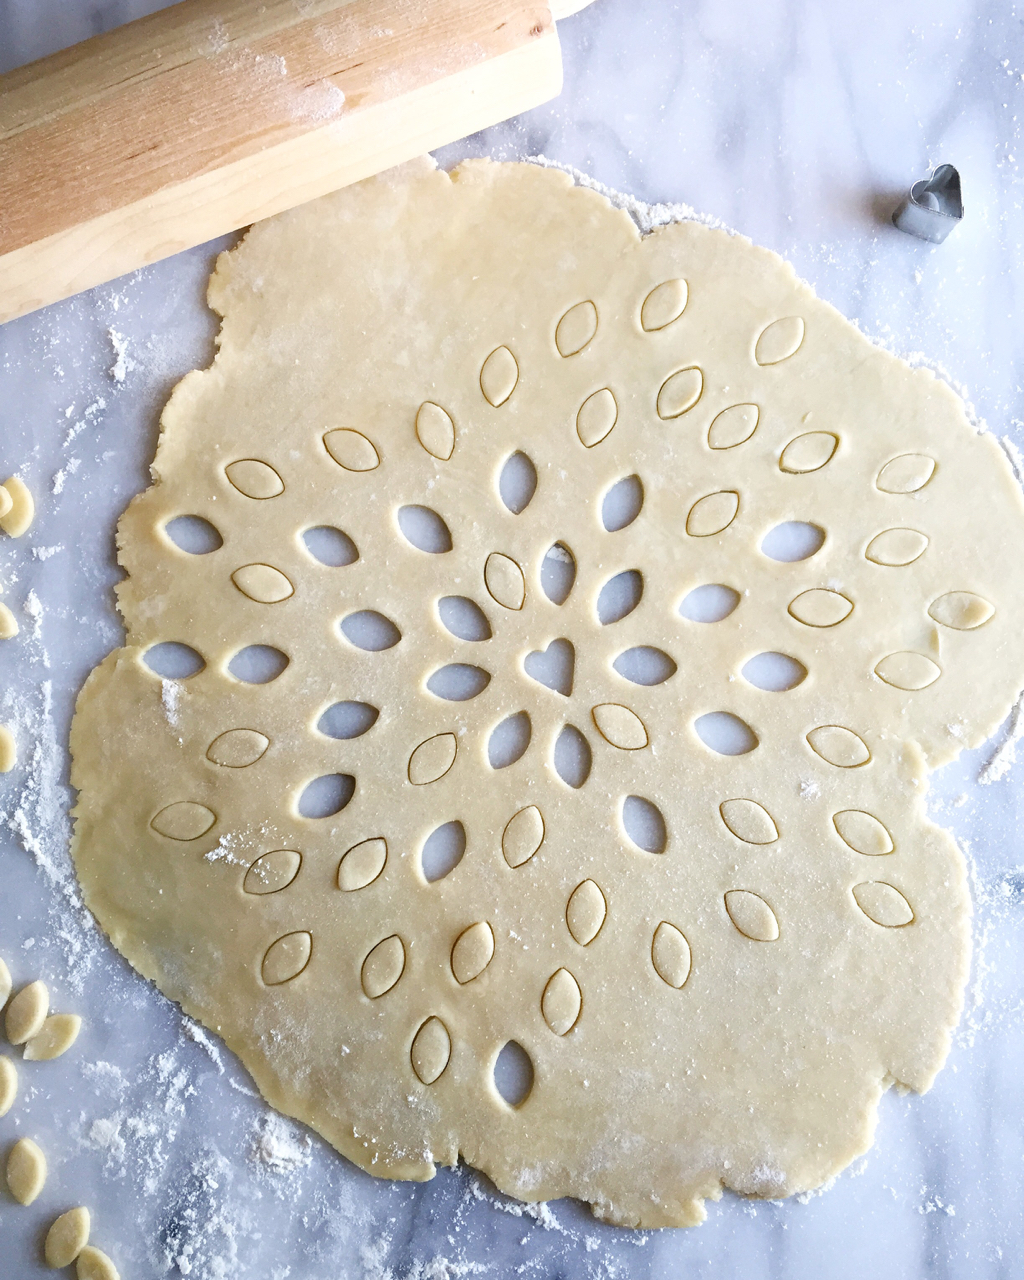
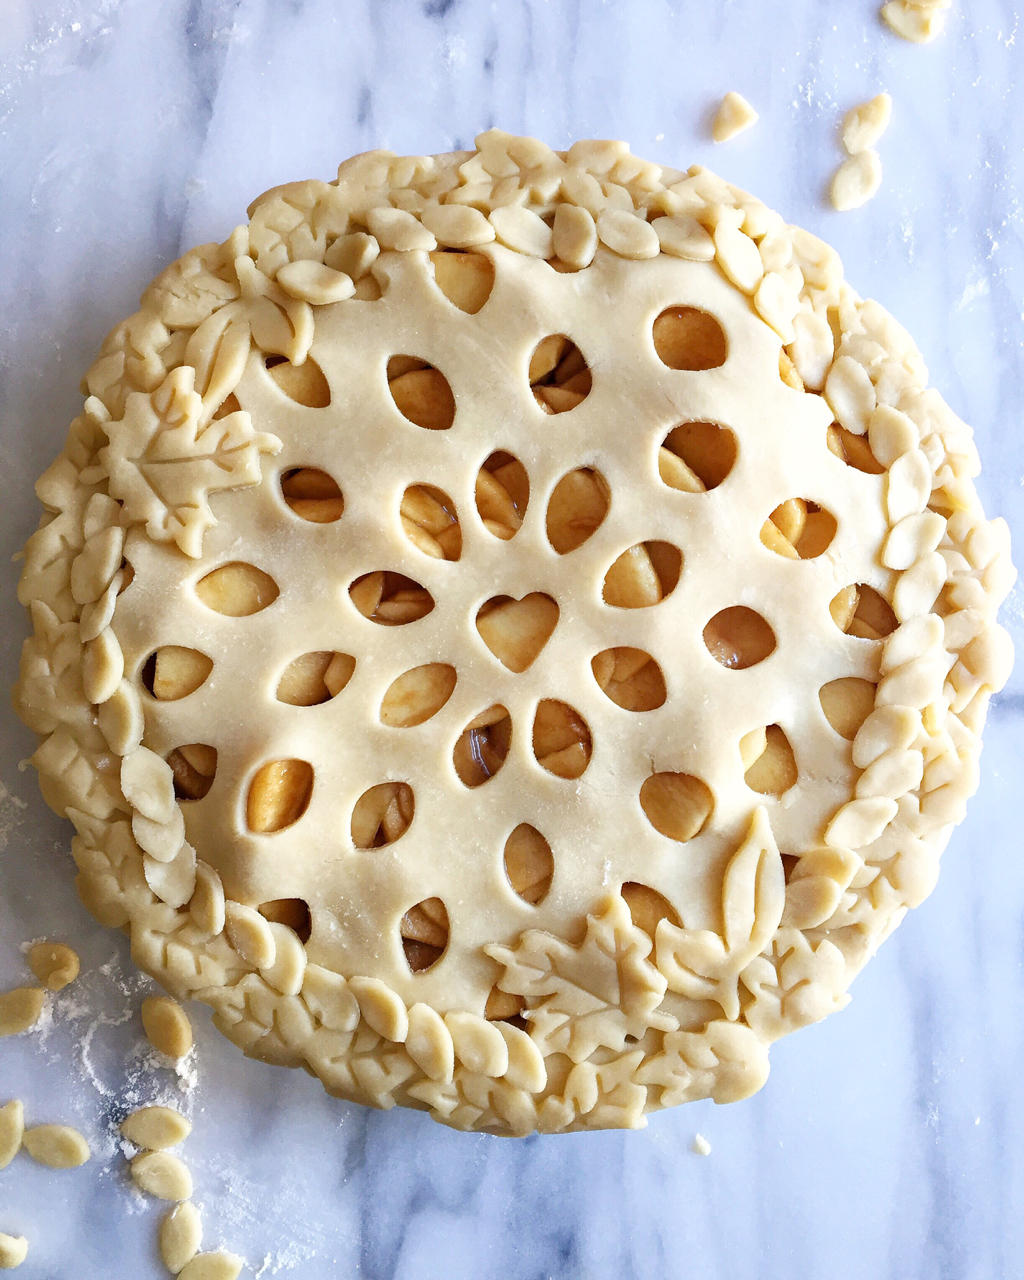
- Roll out one of the flattened disks of dough and line the pie pan with it, trimming off the excess edges around the rim of pie pan.
- Roll out second flattened disk of dough. I used these mini steel cutters that come in an assortment of shapes, all about .5" big. Make whatever cutouts in whatever pattern you want!
- As you make cutouts, beware of making them too close together, as when you drape them over the heaped apples, the dough will stretch and the holes will tear if too close.
- Carefully drape the top cutout layer after you fill the pie. Trim off excess ends.
- Using remaining dough, roll dough out and make desired cutouts you'd like to decorate the crust with. I used leaf patterns and the dough I got from the cutouts made on the top layer.
For Pie Filling
- The pie filling was amazing in terms of taste. However, there were a few things I'd change if I made this again:
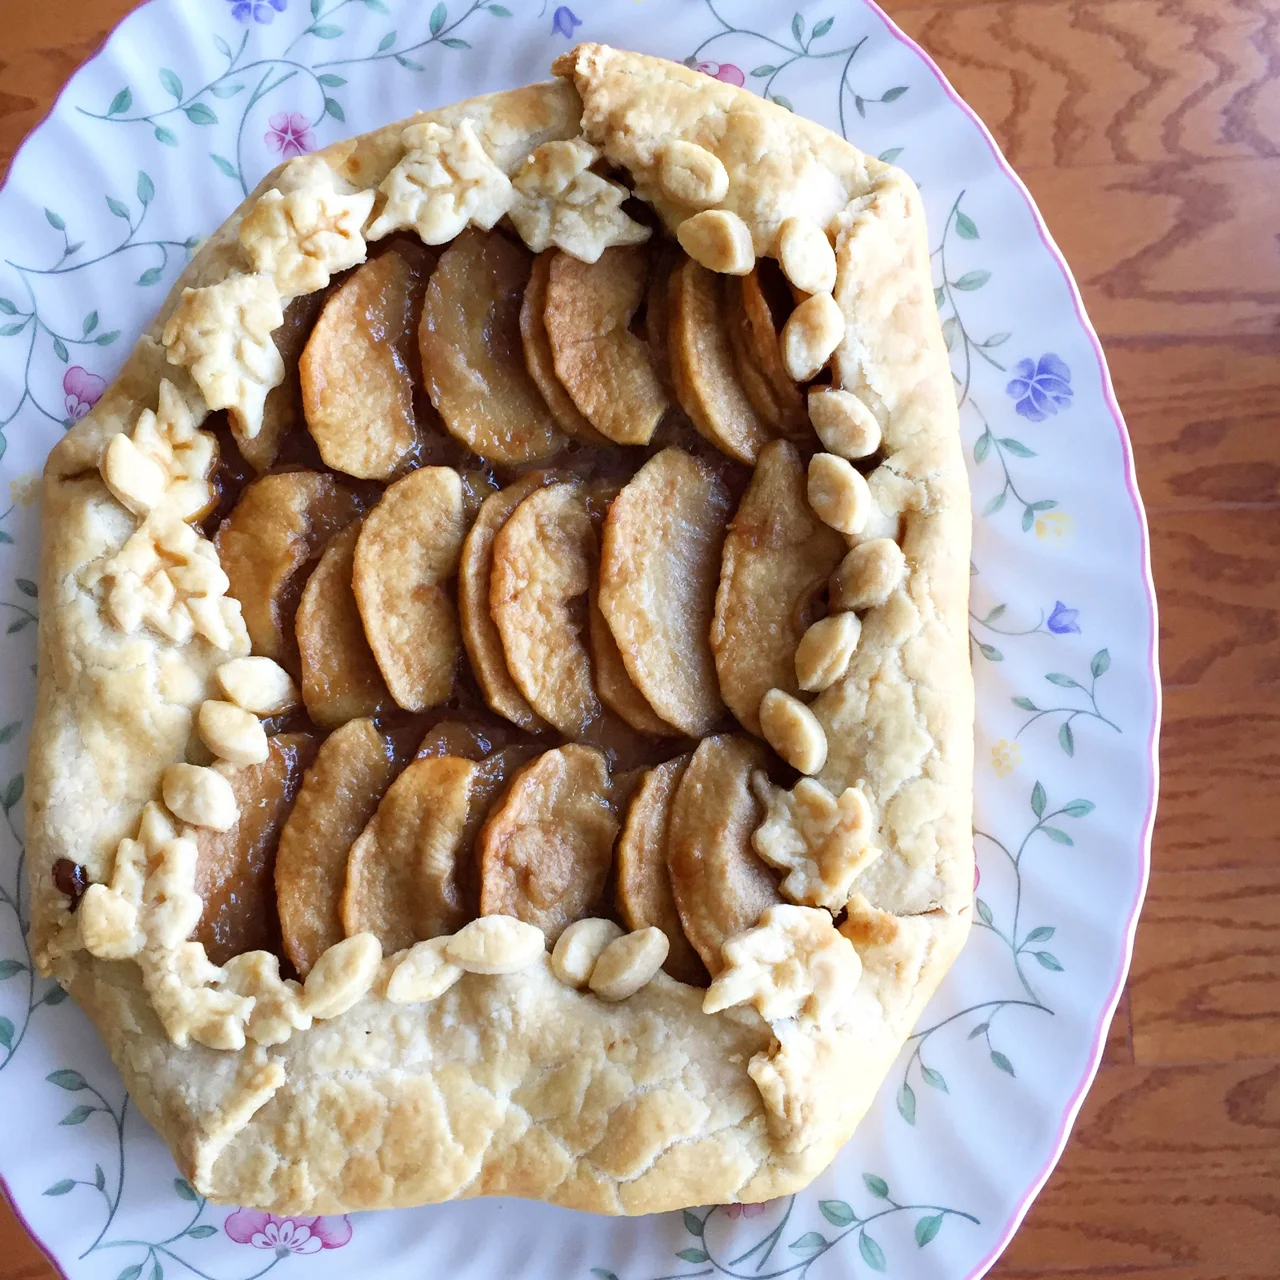
- Firstly, the recipe calls for 8 apples which I found to be WAY too many. I made an entire galette (pictured below) with the leftover apples! I think 5 apples would still give you plenty to load up your pie.
- When you reduce the cider, don't be alarmed at how little liquid you have left- it should be a very small concentrated amount and not too liquidy. If you don't reduce it enough, you run the risk of having a runny/soupy pie.
- Absolutely let the pie cool and "set" at the end. Otherwise it will not hold together as well.