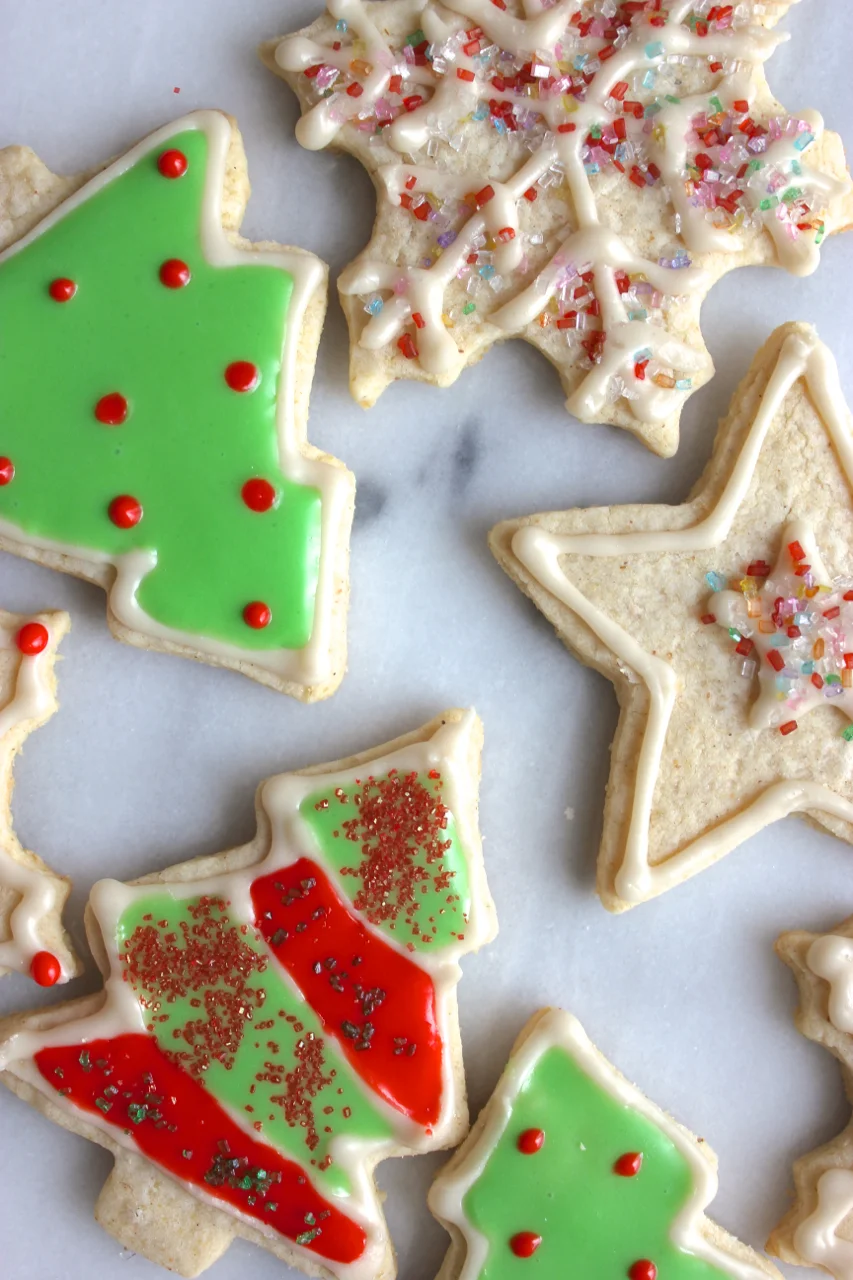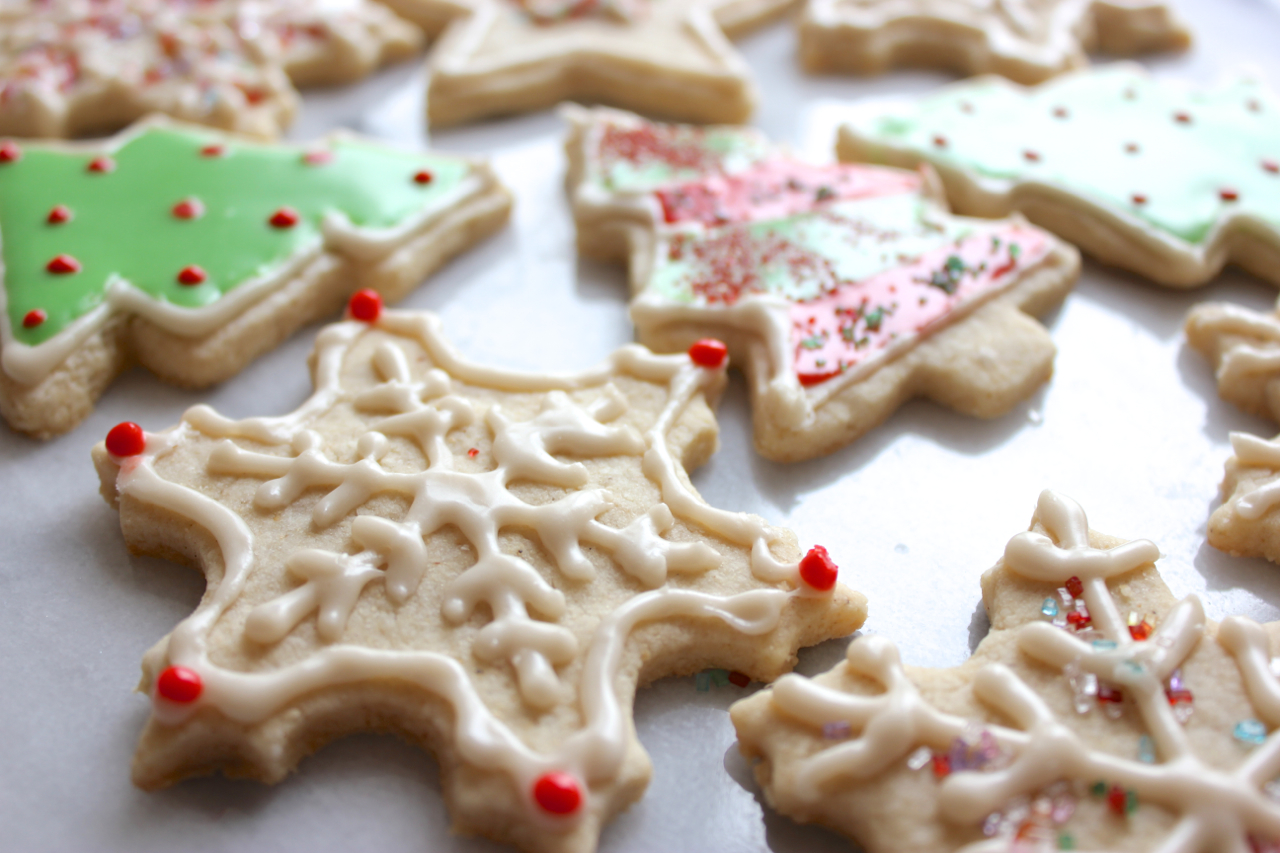
Gluten-Free Classic Cutout Sugar Cookies

How on earth is it Christmas Eve already?! Seems like I was just talking about how excited I was for Autumn and Thanksgiving. Well, happy Christmas Eve to you all!
Remember those Pillsbury sliceable Sugar Cookies they would make for every holiday possible? I used to love those as a kid, and we would always leave those out for Santa on Christmas Eve. But I don't even want to know about the massive amounts of unpronounceable ingredients that went into those dozens I ate when I was younger... Anyway, I wanted to bring you guys this recipe in time to make a batch of these for Mr. Claus.

This is a pretty simple, straightforward recipe using my all-purpose gluten-free flour blend for cookies. It's a really solid cutout sugar cookie that holds up through all the handling while icing, yet still is soft and chewy when you bite into it. You can also make these into vegan sugar cookies by just swapping the butter for vegan butter.
From a nutritional perspective, I personally am not the biggest fan of the vegan butters I know of for the sheer amount of not the best oils in there, but I haven't done enough research on all the available vegan butter options out there to properly make an opinion on the matter- do any of you vegan fans out there have a healthier favorite?

Whether you're looking for cookies to make with your friends or kids, or for a Celiac Santa, these are the perfect fit. Happy holiday baking, friends!

Gluten-Free Classic Cutout Sugar Cookies
*Recipe makes about 2.5 dozen cookies
*dough needs to chill for at least 2 hours, or up to 2 days in the fridge- plan accordingly!
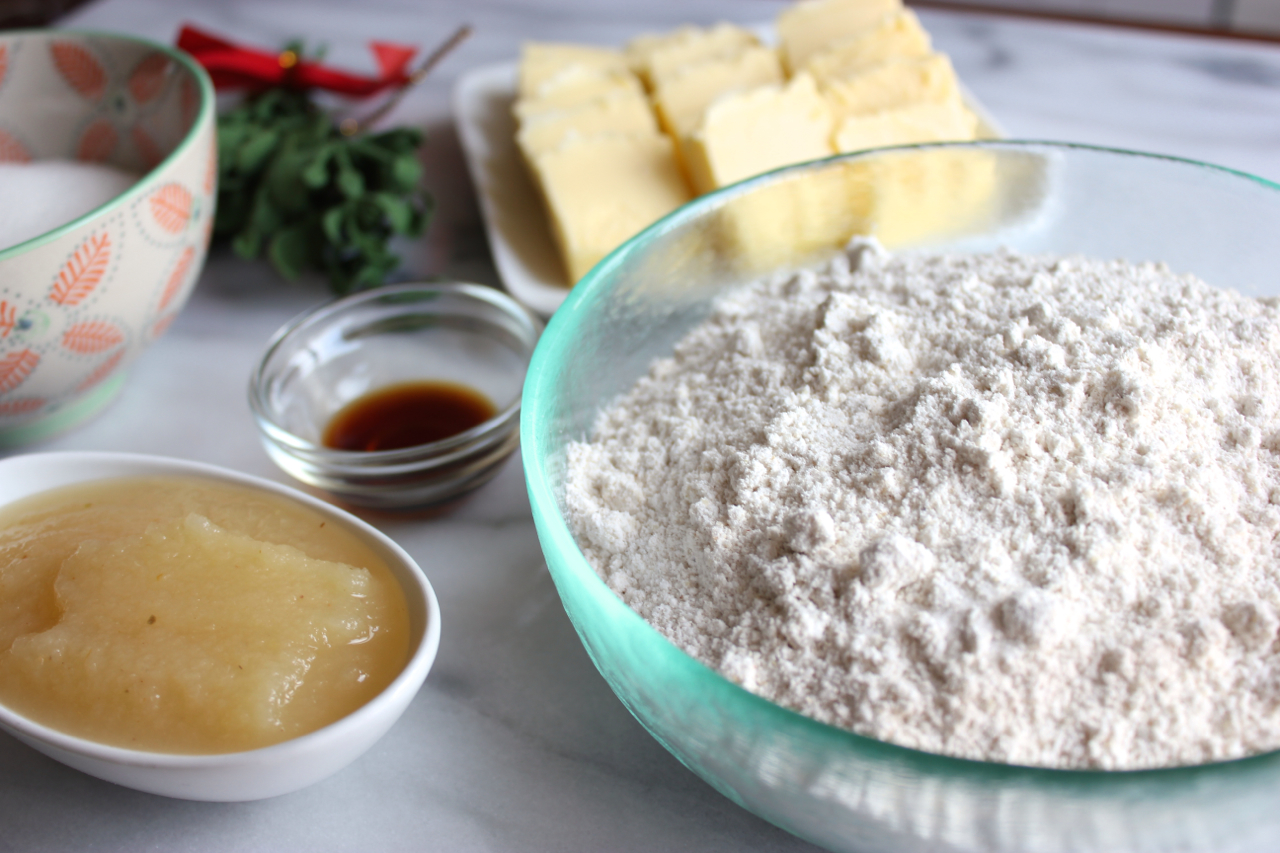
Ingredients
3 Cups Gluten-Free All Purpose Blend for Cookies + ~1/2 cup for rolling out dough
1 cup (2 sticks) unsalted grass-fed Butter, room temp.
1 cup granulated Sugar
1/4 cup unsweetened Apple Sauce
1/4 tsp Salt
1/4 tsp Pure Vanilla Extract
Recipe
1. In a small bowl, combine flour and salt. Stir well with a whisk and set aside.
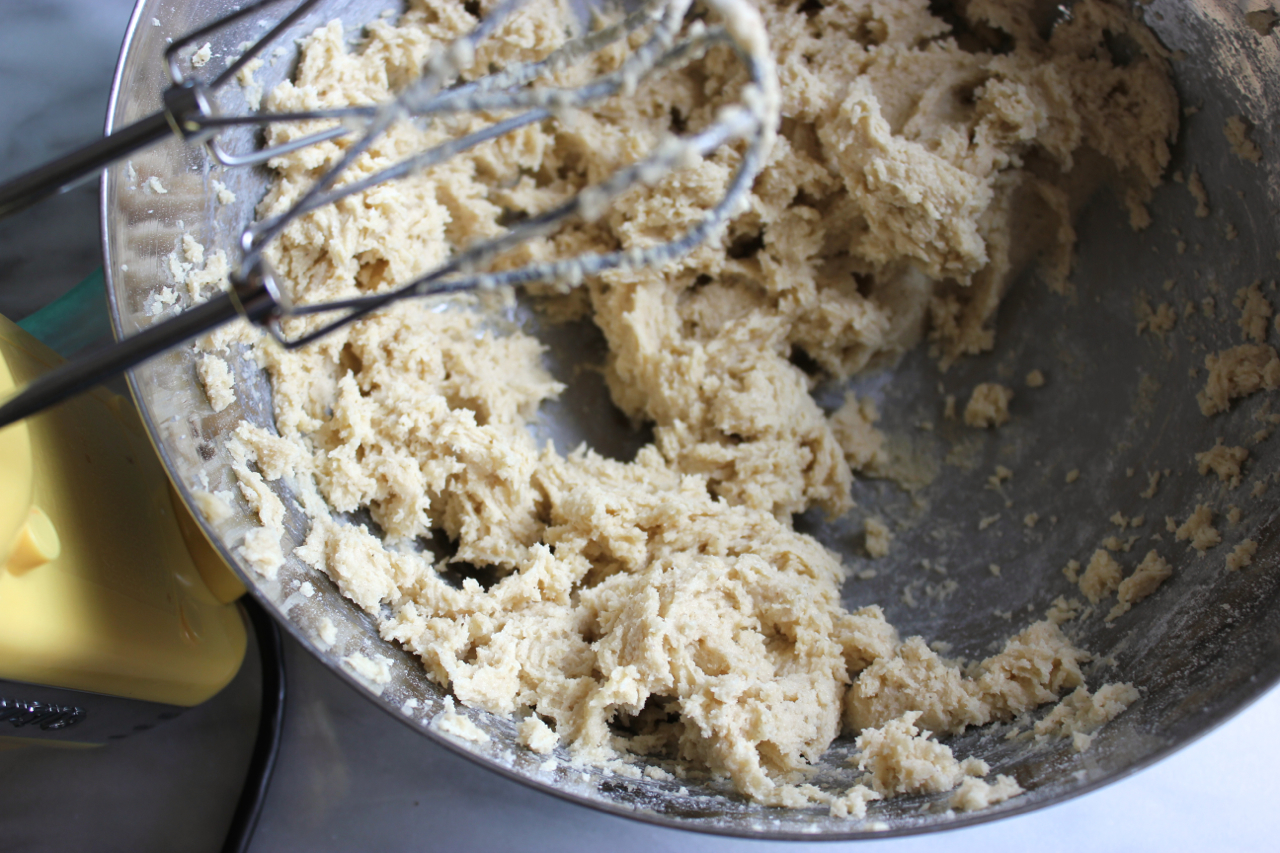
2. Using a hand mixer or a stand mixer (paddle attachment), beat the butter until creamy. Add in the sugar and beat until creamy. Add in applesauce and beat until combined.
3. Gently beat the flour mixture into the wet mixture with the mixer on the lowest speed until flour is relatively incorporated- you should see just a bit of flour still on the sides of the bowl. Stop the mixer, and finish mixing the dough with a spatula by hand. The dough should now be soft and pliable.
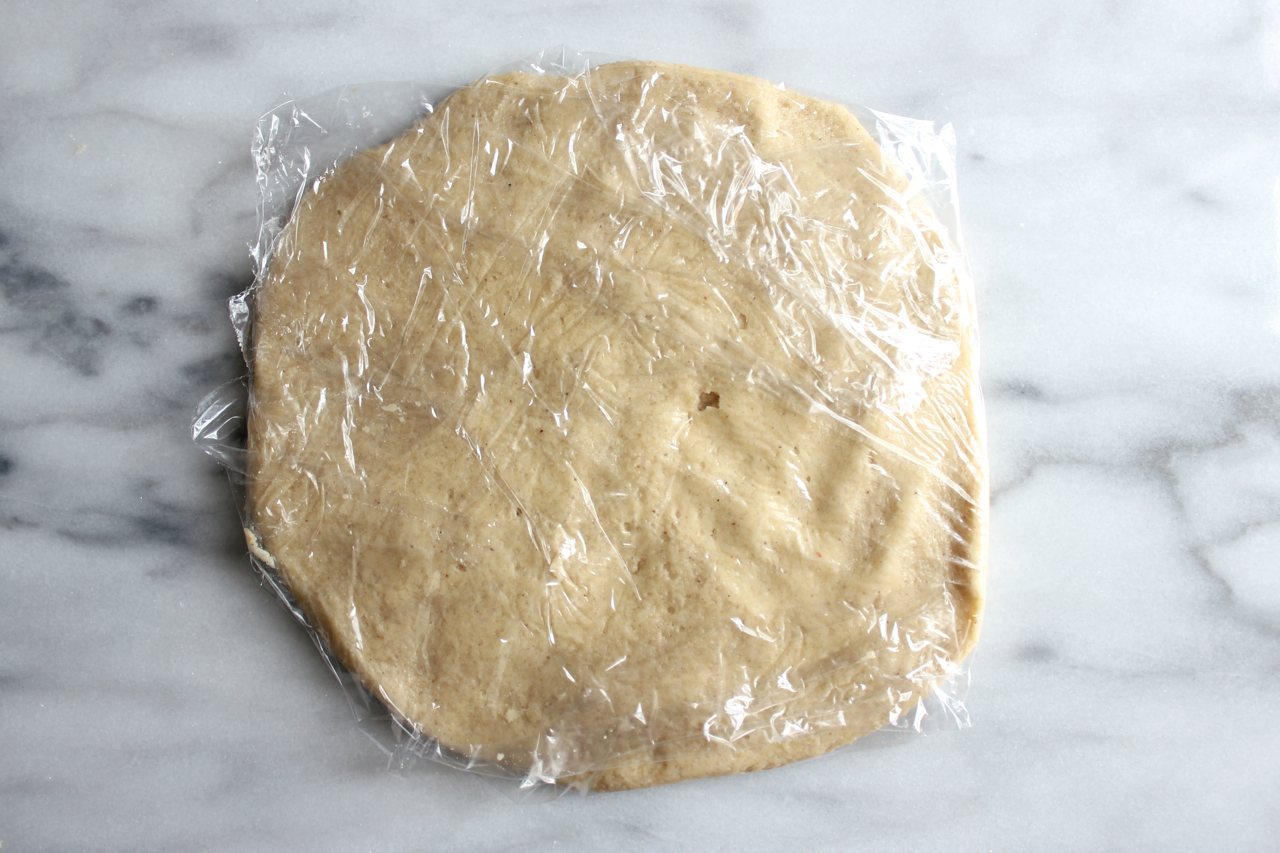
4. Divide the dough into 3 pieces. Flatten into a nearly pancake-thin (a little over a 1/4 inch) disk and wrap in plastic wrap. Chill dough in the fridge for minimum 2 hours, or up to 2 days in an airtight container.
5. When ready to bake cookies, preheat the oven to 350ºF and line baking sheets with parchment paper.
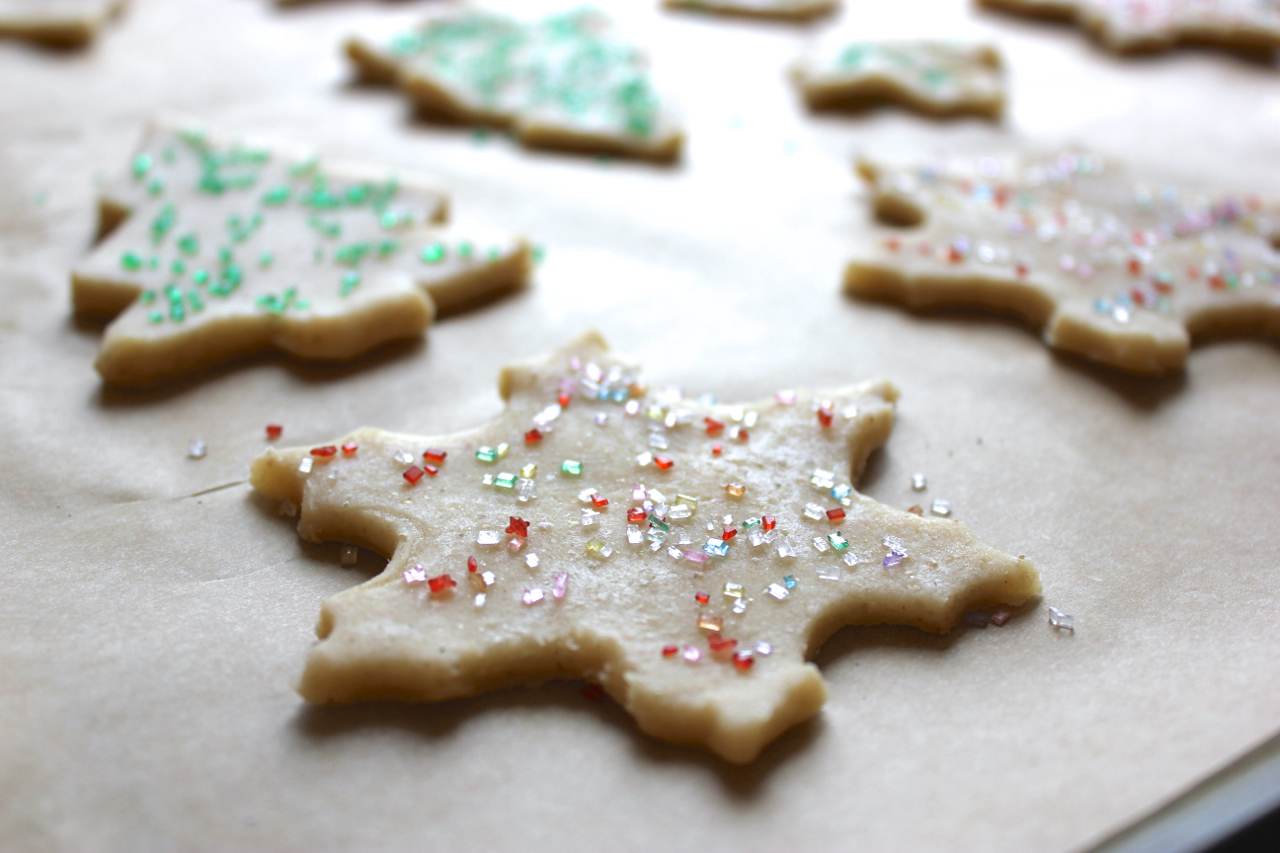
6. On a clean working surface (marble slab or any countertop is great), evenly sprinkle flour on surface and rolling pin. Place one of the disks of dough on the surface and sprinkle top with flour. Roll out dough to a little around or under 1/4 inch thick. Using a cookie cutter, cut out as many cookies as you can, then ball up scraps to make another dough disk to work with. Continue process until all cookies are cut out.
*Important Tips on Rolling w/Gluten-free Dough
Gluten-free flour can be a little tougher to roll out. With regular cookie dough, you want to ensure the dough stays cold throughout the rolling process, but don't worry about it so much here, because when the gluten-free dough is as cold as it should be with regular dough, it is very hard to roll out the dough without it cracking. Once it warms up a tiny bit for a few minutes out of the fridge, it's perfectly pliable.
My suggestion is to do all your cookie cutting, then place the whole baking sheet in the fridge to chill for about 5 minutes before popping it in the oven.
7. Place baking sheet in the oven for 10-12 minutes (mine were 10 minutes)- cookies will look a bit golden at the edges, and just a little puffy in the center. Remember, cookies continue baking when out of the oven so don't overbake!
8. Let the cookies cool for about 3-5 minutes on the baking sheet, then use a flat spatula to move them over to a cooling rack to cool completely.
Icing: If icing, wait until cookies are 100% cooled down.
Recipe for simple icing: 1 cup powdered sugar, 2.5-3tbsp of water or any type of milk. Whisk until smooth- you want it to be thick and just pourable enough. If too watery, add more sugar, if too thick, add a teeny bit of water. Add in food coloring if desired.
I used a pastry bag to ice my cookies, but a squeeze bottle works too. Spread the cookies out on a tabletop and decorate the cookies any way you want. Let the icing dry for 8-10 hours, best left overnight. Once dry, the cookies can be gently stacked (use parchment paper to divide layers if you want to be extra careful) and put in an airtight container. Best to consume within a week.